
Reclaimed Wood Beaded Bracelet
Reclaimed Wood Beaded Bracelet
Couldn't load pickup availability
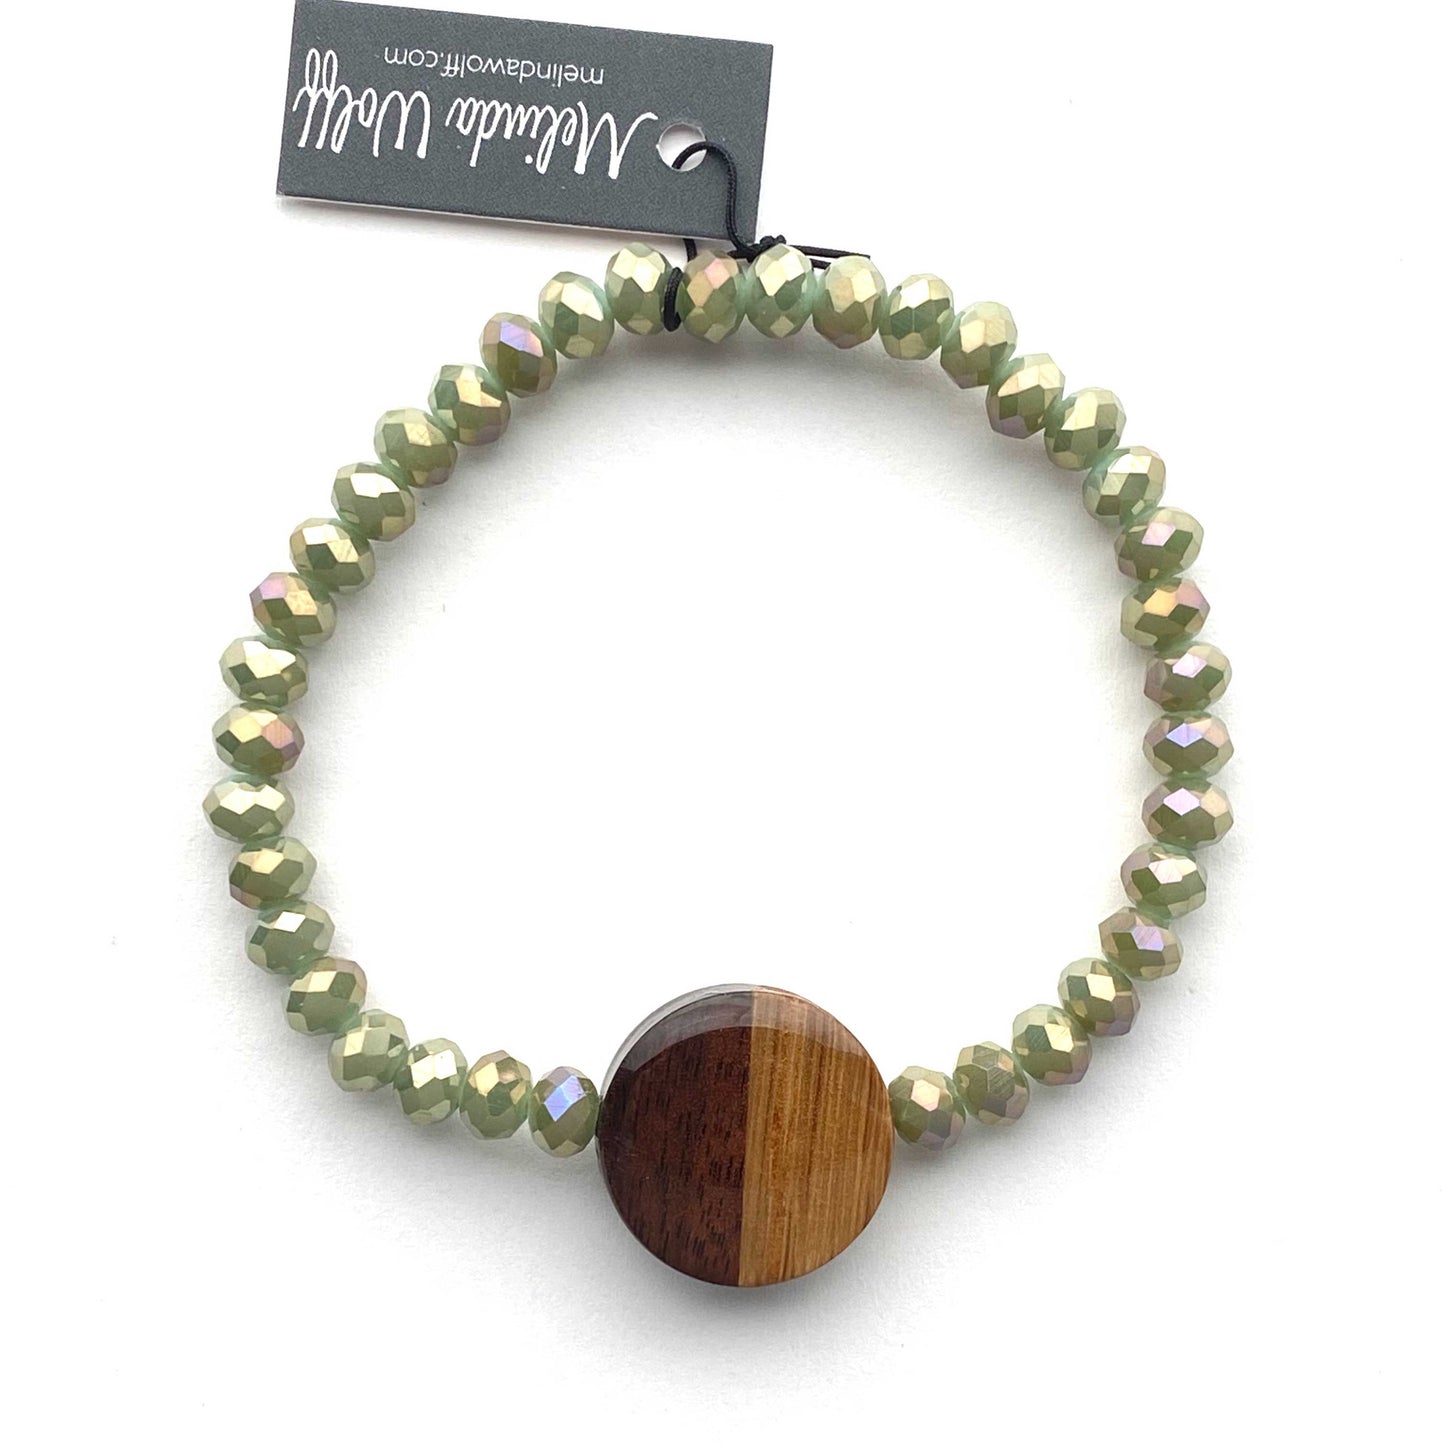
Simple and versatile, this stretch beaded bracelet is designed for everyday comfort and style. It features a handmade reclaimed wood bead finished with a resin coating that adds a touch of shimmer. Surrounded by light green faceted glass beadsand crafted with a flexible stretch band, it’s perfect worn solo or stacked for a layered look.
Product Details
Product Details
Sustainability story
Sustainability story
Distinctive and one of a kind, Melinda Wolff’s jewelry is crafted with sustainability in mind from reclaimed wood selected from her husband’s woodshop. These handmade pieces retain their natural character through a clear resin coating that accentuates the natural beauty of the wood.
Shipping & Returns
Shipping & Returns
- All orders are processed within 24-48 hours (excluding weekends and holidays) after receiving your order confirmation email.
- Please inspect your order upon reception and contact us immediately if the item is defective, damaged or if you receive the wrong item, so that we can evaluate the issue and make it right.
 Heading
 Heading
 Heading


Let customers speak for us
Melinda was wonderful to work with and her earrings are gorgeous! There was an issue with my original earring order where they got lost in the mail (not Melinda's fault in the slightest) and she was extremely quick to respond to work to resolve the issue. The earrings were a gift for my mom for Christmas, and Melinda sent me a replacement pair within a day to ensure that they would arrive in time for her to open on the holiday. Overall, it was a great experience and absolutely beautiful product! I would highly recommend Melinda and her products to anyone!
Melinda's earrings were gorgeous and her customer service was wonderful! There was an issue with my original earring order where it had gotten lost in the mail (not Melinda's fault in the slightest) and she was extremely gracious and quick to respond to resolve the issue. The earrings were for my mom as a Christmas present and Melinda sent me a replacement pair of earrings so that they would arrive in time for the holidays! Overall, a wonderful experience and a beautiful product!


I love all of the earrings and necklaces I've bought from Melinda. Excellent quality and so unique.
Shipping is always quick and well packaged. I will continue to purchase from her.
I've been stopped multiple times asking me where I got my earrings! They are just so beautiful!

How It's Made
-

Step 1: Sourcing Reclaimed Wood
I dig through scraps from my husband's woodworking shop to find the coolest wood combinations for each piece of jewelry.
-

Step 2: Cutting the Shapes
Using a band saw, I cut out the jewelry shapes. Push sticks (upper left corner) guide the wood and keep my fingers safely away from the blade.
-

Step 3: Refining & Sanding
I use a belt sander to refine the shapes and remove saw marks. The electrical tape protects my fingers - safety first!
-

Step 4: Slicing Thinner
Next, I slice the shapes into thinner pieces using the band saw. Push sticks keep my fingers far from the blade.
-

Step 5: Sanding the Slices
Back to the belt sander to remove saw marks from the freshly sliced pieces. Taped fingers are a must for this step!
-

Step 6: Hand Sanding
Each piece is hand-sanded with fine grit sandpaper to smooth the edges and remove any remaining imperfections.
-

Step 7: Applying Resin
I apply resin coating in my dust-free studio. Each side cures for 3 days. The resin highlights the natural colors and textures, making pieces look like glass or stone.
-

Step 8: Drilling Holes
Using a drill press, I carefully drill holes needed to assemble the pieces into necklaces and earrings.
-

Step 9: Final Assembly
The final step - assembling the wood pieces into wearable jewelry! Each piece is then tagged, photographed, and ready to share nature's beauty with you.


